7 minutes reading time
WireGuard is, lightweight, fast, open-source VPN that uses public/private key cryptography to securely connect devices over the internet. I've used WireGuard for accessing my home network and have setup WireGuard VPNs for clients. This page has some notes I've taken when setting up WireGuard.
In Wireguard, every computer involved is technically a peer. My typical setup is a "roaming-access" configuration with a public-facing peer for access over the internet. I'll refer the public peer as the server. It has a stable public IP/DNS name and listens for incoming traffic from the internet.
wg to generate public and private keys.
You'll need to copy these keys into WireGuard config files. The key files are just text files and you can look at them with any text editor (or just cat them on a terminal). Most guides put the keys in /etc/wireguard. This isn't necessary, but You should make sure the private key is not readable by everyone.
Peers in your private network will need IP addresses. There are three standard private IPv4 address blocks:
For this example I'm using 10.20.30.XXX for my PCs.
[Interface]
51820
<YOUR PRIVATE KEY FROM STEP 2>
true
Important SaveConfig is set to true here. You should not manually add computers to the [Peer] section. If you do, they'll get erased when the server is restarted.
AllowedIP routes.To enable IP forwarding, open /etc/sysctl.conf with an editor and uncomment the line with net.ipv4.ip_forward=1
Next update your system with sysctl
Some other things to add are
iptables rule to allow traffic between WireGuard peers.-A FORWARD -i wg0 -o wg0 -j ACCEPT
iptables rule to allow your server to act as a router.-t nat -I POSTROUTING -s -o eth0 -j MASQUERADE
This lets you hide peer IP addresses behind the server IP address. I generally don't use this but have included it in the configuration for completeness.
So update /etc/wireguard/wg0.conf to look like:
[Interface]
51820
<YOUR PRIVATE KEY FROM STEP 2>
true
ufw route allow in on wg0 out on eth0
iptables -t nat -I POSTROUTING -s -o eth0 -j MASQUERADE
iptables -A FORWARD -i wg0 -o wg0 -j ACCEPT
ufw route delete allow in on wg0 out on eth0
iptables -t nat -D POSTROUTING -s -o eth0 -j MASQUERADE
iptables -D FORWARD -i wg0 -o wg0 -j ACCEPT
Note The network device here is eth0. You may have a different device, you can list devices with ip link show.
You can check for errors with systemctl status
wg set command.you can also remove peers with wg set
Fedora uses firewalld by default. firewalld is zone-based, so instead of adding iptables rules to wg0.conf, we assign interfaces to zones like public or internal and let the firewall handle the rest.
use wg to generate public and private keys
You'll need to put these keys into WireGuard config files. The key files are text files and you can look at them with any text editor (or just cat them on a terminal)
For this example I'm using 10.20.30.XXX for my PCs.
[Interface]
51820
<YOUR PRIVATE KEY FROM STEP 2>
true
Important SaveConfig is set to true here. You should not manually add computers to the [Peer] section. IF you do, they'll get erased when the server is restarted.
and add net.ipv4.ip_forward=1
then apply it
check with
should see
# sysctl net.ipv4.ip_forward
IMP instead of using PostUp and PostDown in wg0.conf for routing, masquerade, and peer traffic I'll use zones in firewalld with firewall-cmd.
figure out your zone
which shows me
)
we also have several predefined zones
FedoraServer zone and assign wg0 to internal
)
firewall-cmd --get-zone-of-interface=wg0
(you may want to make a custom wireguard zone for a more locked-down setup)
inspect
add clients with
WireGuard runs on many platforms. I've helped customers configure clients on various systems, including Linux, Windows and macOS.
Ubuntu and Fedora configuration is largely the same. The only real difference is using apt or dnf
On Ubuntu
On Fedora use wireguard-tools
[Interface] and [Peer] sections in /etc/wireguard/wg0.conf[Interface]
<YOUR CLIENT PRIVATE KEY>
[Peer]
<THE SERVER PUBLIC KEY>
XXX.XXX.XXX.XXX:51820
25
[Interface]/PrivateKey : The private key you generated in step 2.[Interface]/Address : The address of your client in the subnet.[Peer]/AllowedIPs: Sets the range of IP addresses it can access through the VPN. In this case, t limits the VPN traffic to the 10.20.30.0/24 subnet.[Peer]/Endpoint : The public address or hostname of your WireGuard erver[Peer]/PersistentKeepalive: Sends packets to the server at regular intervals. This is not really necessary, but I've used this to keep peers from disappearing at some customer setups.wg set wg0 peer <PEER_PUBLIC_KEY> allowed-ips <PEER_IP_ADDRESS>/32
Make sure the <PEER_IP_ADDRESS> matches the address you used in step 3.
or
Windows installers can be obtained from WireGuard.
Go to https://www.wireguard.com/install/, download the Windows installer.
Run the installer.
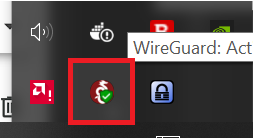
Once installed it should appear in the system tray. It'll be a red circle with a dragon symbol in it. Left click it to open the WireGuard window.
In the WireGuard window, use the "Add Tunnel" drop down to "Add empty tunnel". 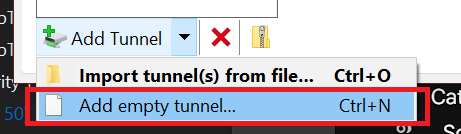
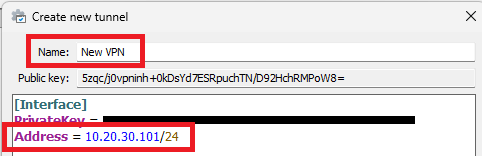
In the "Create new tunnel" dialog box give the tunnel a name and make note of the public key.
[Interface]
<YOUR CLIENT PRIVATE KEY>
[Peer]
FD+EO4rr6KWg3LBnHRATi1I6qoAk7J9rk0a2XDbpCD0=
XXX.XXX.XXX.XXX:51820
25
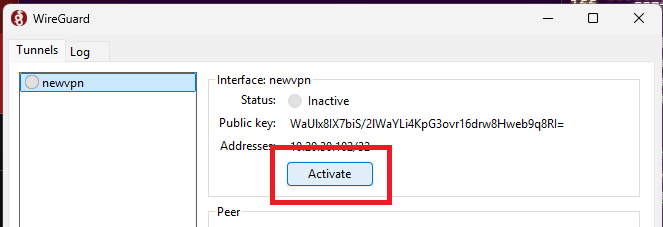
Press Save to save the tunnel configuration.
wg set wg0 peer <PEER_PUBLIC_KEY> allowed-ips <PEER_IP_ADDRESS>/32
You can activate and deactivate the tunnel from the WireGuard window.

Once it's installed it'll automatically start. You can also launch it from Applications
In the wireguard window, use the "Add Tunnel" drop down to "Add empty tunnel".

I've checked OnDemand for WiFi to automatically activate the VPN when I'm on WiFi 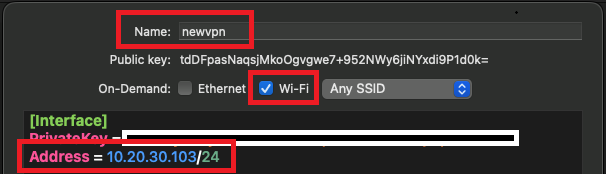
[Interface]
<YOUR CLIENT PRIVATE KEY>
[Peer]
FD+EO4rr6KWg3LBnHRATi1I6qoAk7J9rk0a2XDbpCD0=
XXX.XXX.XXX.XXX:51820
25
save macOS will ask you if you'd like to add the VPN config. Press Allow.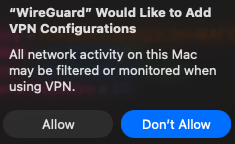
Sometimes you may want to route client traffic through the WireGuard server. I've enabled masquerading in the server configuration sections above. To complete this you need to do a few things to the client configuration.
You can get set DNS to a well known DNS server if you like, or try getting the dns used by your server. ON my linux server I use resolvectl dns eth0 to find its DNS servers.
)
I add a DNS line to the [Interface] section of the client configuration.
[Interface]
<PRIVATE_KEY>
DNS = ,
Change the AllowedIPs to 0.0.0.0/0 (or add it)
[Peer]
FD+EO4rr6KWg3LBnHRATi1I6qoAk7J9rk0a2XDbpCD0=
,
25